Start with config. Go deeper when you need to.
Build agents for everyday work. Connect providers across your machines through mesh. Extend what they can do with recurring tasks.
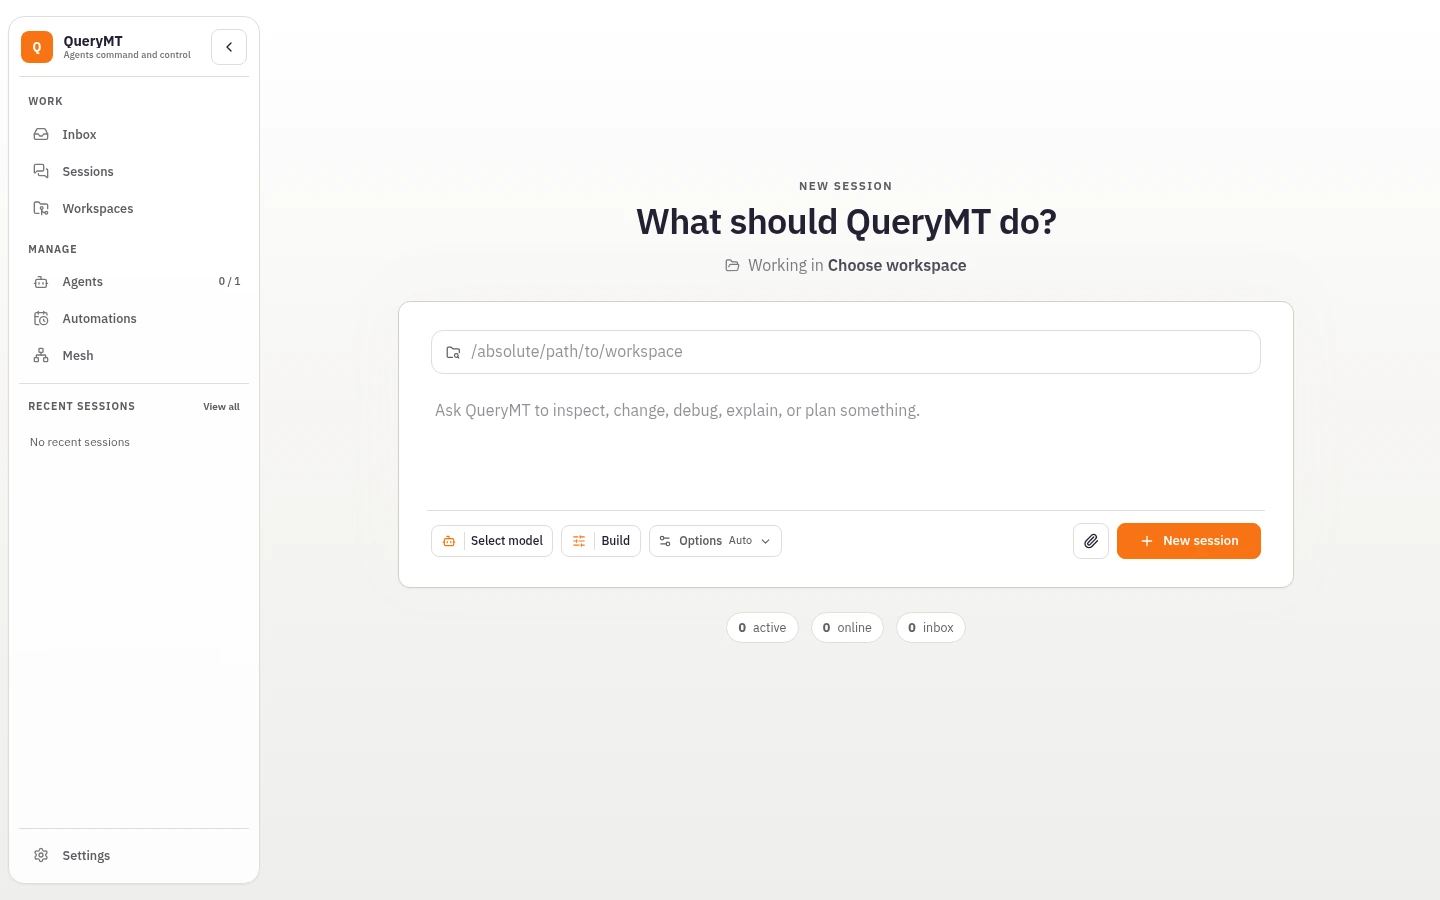
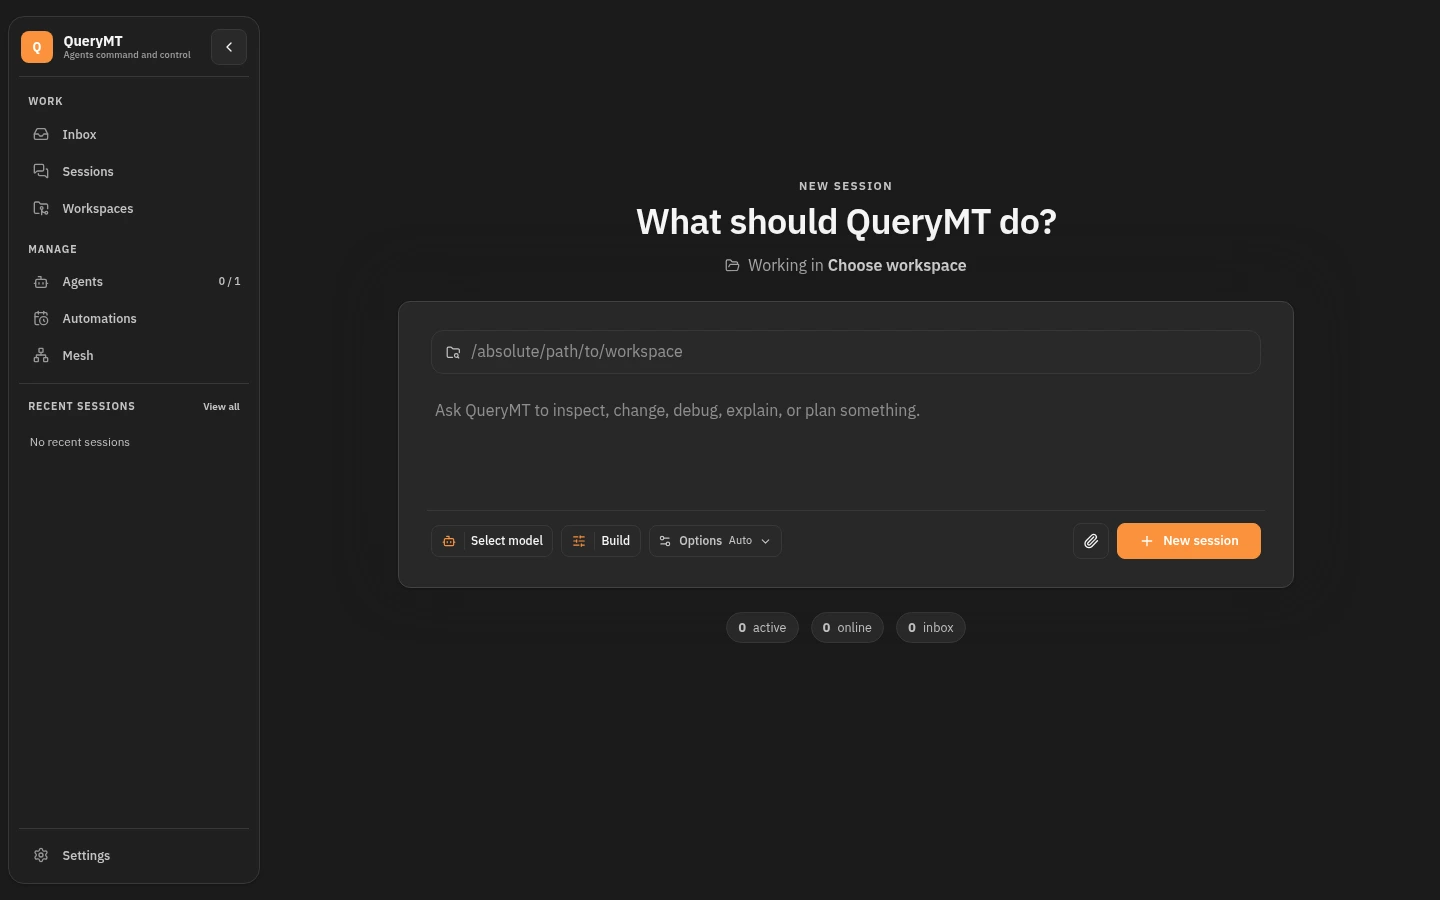
Start with a task. Make the agent yours.
Explore starting points for research, routine work, and coding. Adapt the tools and instructions to fit your task.
Keep the findings. Not just the conversation.
Give research a memory: save sourced findings with knowledge tools, then retrieve them from another session using the same permitted scope.
[agent]
cwd = "."
provider = "openai"
model = "${MODEL:-gpt-4}"
# Save and recall findings with scope="global" in tool calls.
# Both sessions need the same persistent knowledge store
# and runtime permission to access that scope.
tools = [
  "web_fetch", "read_tool",
  "knowledge_ingest", "knowledge_query"
]
system = """
Research the supplied sources and cite your findings.
Save and retrieve approved findings using
scope = "global" in knowledge tool calls.
"""

[[middleware]]
type = "limits"
max_steps = 100
max_turns = 40Compare the supplied sources on SQLite and PostgreSQL for our app. Save the useful findings so we can revisit the decision.
One finding, across two sessions.
- Session A / Save a sourced finding
Illustrative knowledge_ingest arguments after reading a local project note:
{ "text": "Our offline prototype needs a local database.", "source": "notes/database-evaluation.md", "scope": "global" } - Session B / Ask again
A later session calls knowledge_query with the same permitted scope:
{"question": "Why consider SQLite?", "scope": "global"} - Illustrative answer
"The prototype needs a local database for offline work [notes/database-evaluation.md]. SQLite is a candidate; the note does not settle the production choice."
Scope is passed with tool calls. It is not a top-level memory switch in the config.
Setup & requirements
Install the QueryMT toolchain and configure OpenAI credentials. Choose an available model using MODEL, or edit the provider and model in the config. Save the file and load it in QueryMT from the intended workspace.
Requires a configured persistent knowledge store and permission to access the same global scope from both sessions. The prompt requests that scope; runtime policy controls access. Only store findings intended to be shared. Supply accessible URLs or local text files; web_fetch needs network access.
Give recurring work a bounded run.
Turn a repository summary into a recurring task. The config limits each run; a separate runtime schedule determines when it starts.
# Configure the schedule separately in the dashboard or API:
# interval = every 86,400 seconds; run count = 30 cycles.
# These comments do not create a schedule or set a 9 AM run time.
[agent]
cwd = "."
provider = "openai"
model = "${MODEL:-gpt-4}"
tools = ["shell", "read_tool", "glob", "search_text"]
system = """
Summarize the last 24 hours of local git activity.
Group changes by area and cite commit IDs.
Do not modify files or run mutating commands.
Report missing context instead of inventing blockers.
"""

# Bound each cycle to 30 steps / 15 turns.
[agent.execution.tool_output]
max_lines = 1000
max_bytes = 25600

[[middleware]]
type = "limits"
max_steps = 30
max_turns = 15Summarize the last 24 hours of local git activity. Group the changes and cite the commits.
Same task. A fresh run each interval.
- Cycle 1 / Example brief
Fictional commits illustrate the format, not activity from a real repository:
Config: handle unset model values (a1b2c3d) Tests: cover the missing-value case (d4e5f6a) Follow-up: verify behavior with an empty MODEL value. - Cycle 2 / No new changes
At the next configured interval, the same task checks the new time window:
No commits in the last 24 hours. No new project activity to summarize. - If the run hits its limit
The cycle is bounded to 30 steps and 15 turns; hitting a limit does not mean the task is complete. The separate schedule ends after its configured 30 cycles.
An interval is not a wall-clock promise: every 24 hours does not mean 9 AM each day.
Setup & requirements
Install the QueryMT toolchain and configure OpenAI credentials. Choose an available model using MODEL, or edit the provider and model in the config. Save the file and load it in QueryMT from the intended workspace.
Requires Git, a repository, and a running scheduler host. Create the interval schedule through the dashboard or API with the example prompt and a 30-run limit. Test a manual cycle first. Shell access can execute commands; a non-mutating prompt is not a sandbox. Step limits are not a guaranteed cost ceiling.
Check the command before it runs.
Attach a local policy hook to shell calls. This example blocks two destructive command patterns before execution, rather than relying on a prompt alone.
[agent]
cwd = "."
provider = "openai"
model = "${MODEL:-gpt-4}"
assume_mutating = false
mutating_tools = ["edit", "shell"]
tools = ["read_tool", "index", "glob", "search_text", "edit", "shell"]
system = "Inspect the source, propose a focused change, and report verification."

# Run a local policy hook before shell calls only.
# Save the required script as hooks/check-shell.sh.
# It blocks "rm -rf" and "git reset --hard" substrings.
# This narrow pattern guard is not a shell sandbox.
[agent.hooks]
enabled = true

[[agent.hooks.pre_tool_use]]
matcher = "^shell$"

[[agent.hooks.pre_tool_use.hooks]]
type = "command"
command = "sh ./hooks/check-shell.sh"
timeout_sec = 5

[[middleware]]
type = "agent_mode"
default = "plan"

[[middleware]]
type = "limits"
max_steps = 200
max_turns = 50Inspect the failing tests and propose a targeted fix. Check shell commands against the local policy.
A rejected command, not a polite warning.
- Proposed shell command
An illustrative request reaches the pre-tool hook:
git reset --hard - Hook response / Blocked
check-shell.sh returns a policy decision before the command executes:
{ "decision": "block", "reason": "Dangerous shell command blocked by local policy" } - Illustrative agent reply
"The reset was blocked by local policy. I will inspect the diff and propose a targeted fix instead." Other commands still follow runtime permissions.
The full config starts in plan mode. The hook is the demonstrated guard; a mode reminder alone is not a security boundary.
hooks/check-shell.sh
#!/bin/sh
input="$(cat)"

case "$input" in
  *"rm -rf"*|*"git reset --hard"*)
    printf '{"decision":"block","reason":"Dangerous shell command blocked by local policy"}'
    ;;
  *)
    printf '{}'
    ;;
esac
Setup & requirements
Install the QueryMT toolchain and configure OpenAI credentials. Choose an available model using MODEL, or edit the provider and model in the config. Save the file and load it in QueryMT from the intended workspace.
Save the included script as hooks/check-shell.sh relative to the hook working directory and verify path resolution before use. Requires sh and a trusted workspace. Hooks execute local code. This script only rejects two substrings; it does not prevent equivalent destructive commands or guard the edit tool. Review permissions before switching from plan to build mode.
What should your agent do?
Coming soon. Nothing is sent or saved.
Your TOML config will appear here.
Adapted configs, not packaged agents. Results illustrate the intended workflow, not recorded runs.
Bring your tools. Keep your workflow.
Connect MCP servers, reuse skills and commands, and run lifecycle checks with hooks. Use QueryMT configuration or enable support for .agents files.
[agent]
cwd = "."
provider = "openai"
model = "${MODEL:-gpt-4}"
# Expose this server's tools; narrow the list if needed.
tools = ["context7.*"]

[[mcp]]
name = "context7"
transport = "http"
url = "https://mcp.context7.com/mcp"
headers = { CONTEXT7_API_KEY = "${CONTEXT7_API_KEY}" }
This connects Context7 so the agent can consult library documentation through its MCP tools.
Set provider credentials and CONTEXT7_API_KEY. Review the server and exposed tools before use; requests go to that service.
---
name: review
description: Review a code change for bugs and missing tests.
---

# Review a change

- Read the changed code and its callers.
- Prioritize regressions, unsafe assumptions, and missing tests.
- Cite a file and line for each finding.
- Separate confirmed bugs from questions.
- Report what you could not verify. Do not modify files.
Enable the skill tool in your agent config to discover and load these review instructions when needed.
Save in the project path shown, or under ~/.qmt/skills for personal reuse. Instructions guide behavior; they do not enforce permissions.
---
description: Review a change before merging
argument-hint: "<change or file>"
---

Review the following change: $ARGUMENTS

Load the review skill and inspect the relevant source.
List findings by severity, with file and line references.
If you find no issues, state what you checked and any gaps.
Do not modify files.
With the review skill and source-reading tools enabled, /review src/auth.ts expands this prompt with the file as its argument.
Save before starting the session. Project commands use .qmt/commands; personal commands use ~/.qmt/commands.
# Add to an existing agent profile; keep its model and tools.
# Run a local policy hook before shell calls only.
# Save the required script as hooks/check-shell.sh.
# It blocks "rm -rf" and "git reset --hard" substrings.
# This narrow pattern guard is not a shell sandbox.
[agent.hooks]
enabled = true

[[agent.hooks.pre_tool_use]]
matcher = "^shell$"

[[agent.hooks.pre_tool_use.hooks]]
type = "command"
command = "sh ./hooks/check-shell.sh"
timeout_sec = 5
#!/bin/sh
input="$(cat)"
case "$input" in
*"rm -rf"*|*"git reset --hard"*)
printf '{"decision":"block","reason":"Dangerous shell command blocked by local policy"}'
;;
*)
printf '{}'
;;
esacBlock shell calls containing "rm -rf" or "git reset --hard" before execution.
Save the script as hooks/check-shell.sh in the hook working directory. This checks two patterns, not all destructive actions.
Your machines. One connected setup.
Choose where the model, session, and delegated work run.
Keep your workspace local. Use the GPU on another machine.
Your laptop
Agent + tools
Local workspaceGPU host
Local model
Inference runs hereView setup
Provider-routing config
- Run a mesh-enabled QueryMT host with Ollama and the selected model available. Keep that host online.
- In an existing quorum profile, merge this peer and delegate configuration. Set GPU_HOST_MULTIADDR to the host TCP multiaddr and match its peer name. The planner needs its own configured provider and the delegate tool.
- Ask the planner to delegate to coder. Model requests, including supplied context, reach the GPU host; files and tools remain on the laptop. This LAN example assumes a reachable, trusted peer.
# Merge into a quorum profile with a configured planner.
[mesh]
enabled = true
transport = "lan"

[[mesh.peers]]
name = "gpu-host"
addr = "${GPU_HOST_MULTIADDR}"

# Only this delegate's model calls go to the peer.
[[delegates]]
id = "coder"
provider = "ollama"
model = "${GPU_MODEL:-devstral:latest}"
peer = "gpu-host"
tools = ["read_tool", "edit", "shell"]
Share providers from the machines you already use.
Sharing is a role, not a dedicated server. A laptop or desktop running qmtcode can also share its configured providers with trusted peers when you explicitly enable provider sharing.
Your laptop uses two sharing peers: Home PC for a local model, and your teammate's laptop for the cloud provider.
Using providers
Your laptop
Local workspace
Files and tools stay here- Agent + tools
Peers sharing providers
Home PC
Local model
Inference runs here- Shares provider
Teammate's laptop
Cloud API connection
API key stays here- Agent + tools
- Shares provider
Cloud service
Cloud service
Model inference
Receives request context- Your laptop — Home PC
- Your laptop — Teammate's laptop
- Teammate's laptop — Cloud service
View setup
Provider-routing config
- On Home PC, configure Ollama with a model its hardware supports. On your teammate's laptop, configure the cloud provider and its credentials. Explicitly enable provider sharing on both trusted peers and keep them reachable and online.
- Merge this snippet into your laptop quorum profile with a configured planner and the delegate tool. Set GPU_HOST_MULTIADDR to Home PC and PROVIDER_HOST_MULTIADDR to your teammate's laptop; gpu-host and provider-host are their configured peer names, not hardware requirements.
- Delegate to local-coder or cloud-reviewer to choose the route. Files and tools stay on your laptop; supplied request context reaches the selected peer and, for cloud review, the cloud service. Cloud credentials stay on your teammate's laptop; cloud terms and billing still apply. These are explicit routes, not automatic load balancing.
# Your laptop: merge into a quorum profile with a configured planner.
[mesh]
enabled = true
transport = "lan"

# gpu-host is Home PC, sharing Ollama with a model its hardware supports.
[[mesh.peers]]
name = "gpu-host"
addr = "${GPU_HOST_MULTIADDR}"

# provider-host is your teammate's laptop, sharing its cloud provider.
[[mesh.peers]]
name = "provider-host"
addr = "${PROVIDER_HOST_MULTIADDR}"

[[delegates]]
id = "local-coder"
provider = "ollama"
model = "${GPU_MODEL:-devstral:latest}"
peer = "gpu-host"
tools = ["read_tool", "edit", "shell"]

[[delegates]]
id = "cloud-reviewer"
provider = "anthropic"
model = "${REVIEW_MODEL:-claude-sonnet-4-5-20250929}"
peer = "provider-host"
tools = ["read_tool", "search_text"]
# Explicitly enable provider sharing on both trusted peers.
# Named routes, not automatic load balancing; files and tools stay on your laptop.
# Cloud credentials stay on your teammate's laptop.
Your laptop uses both sharing peers; another laptop uses the cloud route. Mobile access is shown as planned.
Using providers
Your laptop
Local workspace
Files and tools stay here- Agent + tools
Another laptop
Separate workspace
Its own files and tools- Agent + tools
Mobile
PlannedApp access
Not available yetPeers sharing providers
Home PC
Local model
Inference runs here- Shares provider
Teammate's laptop
Cloud API connection
API key stays here- Agent + tools
- Shares provider
Cloud service
Cloud service
Model inference
Receives request context- Your laptop — Home PC
- Your laptop — Teammate's laptop
- Another laptop — Teammate's laptop
- Mobile — Teammate's laptop (Planned)
- Teammate's laptop — Cloud service
View setup
Provider-routing config
- Configure and explicitly enable sharing on Home PC and your teammate's laptop as in Two sharing peers. Connect only devices you fully trust; drawn routes are not an access-control policy.
- Use the shown two-peer configuration on your laptop. On the other laptop, use the Laptop to laptop snippet with only provider-host, mapped to your teammate's laptop. Each client keeps its own agent, files, and tools; supplied request context reaches the selected peer and any cloud service used. Cloud credentials stay on the sharing laptop.
- The dashed mobile connection is illustrative: the mobile app is planned, not a released client. No mobile setup is provided. Sharing peers must stay online; cloud terms and billing still apply.
# Your laptop: routes to Home PC and your teammate's laptop.
# Your laptop: merge into a quorum profile with a configured planner.
[mesh]
enabled = true
transport = "lan"

# gpu-host is Home PC, sharing Ollama with a model its hardware supports.
[[mesh.peers]]
name = "gpu-host"
addr = "${GPU_HOST_MULTIADDR}"

# provider-host is your teammate's laptop, sharing its cloud provider.
[[mesh.peers]]
name = "provider-host"
addr = "${PROVIDER_HOST_MULTIADDR}"

[[delegates]]
id = "local-coder"
provider = "ollama"
model = "${GPU_MODEL:-devstral:latest}"
peer = "gpu-host"
tools = ["read_tool", "edit", "shell"]

[[delegates]]
id = "cloud-reviewer"
provider = "anthropic"
model = "${REVIEW_MODEL:-claude-sonnet-4-5-20250929}"
peer = "provider-host"
tools = ["read_tool", "search_text"]
# Explicitly enable provider sharing on both trusted peers.
# Named routes, not automatic load balancing; files and tools stay on your laptop.
# Cloud credentials stay on your teammate's laptop.

# Another laptop: use only the Laptop to laptop example instead.
# That example's provider-host is the same teammate's laptop.
# Mobile is planned; this is not a mobile-app configuration.
Work from your interface. Run the session and its tools on the remote machine.
Your interface
Prompts + results
Create or attachRemote workspace
Agent + tools + files
Session lives on the hostView setup
Start from the app
- Connect your app to a trusted mesh host with an agent and workspace configured.
- Choose the remote machine and its workspace to start a session, or open an existing remote session from the app.
- Work with the session through the interface. The agent uses the remote machine's files and tools; keep that host online to continue work.
Let one planner delegate work to agents on different machines.
Your planner
Delegate + collect
Coordinates the taskBuild host
Agent + tools
Build workspaceReview host
Agent + tools
Review workspaceView setup
Planner and remote-agent config
- Run a mesh-enabled agent on each worker host with the tools, provider, and workspace it needs. Prepare the files on each host; mesh does not automatically synchronize repositories.
- Configure the planner provider locally. Set BUILD_HOST_MULTIADDR and REVIEW_HOST_MULTIADDR to the reachable worker addresses and match their peer names.
- The planner delegates to builder or reviewer and collects the results. Each worker executes in its own host environment. These are named routes, not automatic load balancing or pooled GPU memory.
[quorum]
cwd = "."
delegation = true

[planner]
provider = "openai"
model = "${PLANNER_MODEL:-gpt-4}"
tools = ["delegate"]
system = "Delegate tasks to the appropriate remote agent. Report results and failures."

[mesh]
enabled = true
transport = "lan"

[[mesh.peers]]
name = "build-host"
addr = "${BUILD_HOST_MULTIADDR}"

[[mesh.peers]]
name = "review-host"
addr = "${REVIEW_HOST_MULTIADDR}"

[[remote_agents]]
id = "builder"
name = "Build worker"
peer = "build-host"
description = "Run build and test tasks in the host workspace."
capabilities = ["build", "test"]

[[remote_agents]]
id = "reviewer"
name = "Review worker"
peer = "review-host"
description = "Review changes in the host workspace."
capabilities = ["review"]
# Each host supplies its agent, provider, tools, and files.
# Naming a remote agent does not copy a local profile to it.
Trusted peers only. Mesh can expose providers, remote sessions, files, and shell access, not just inference.
Your application. QueryMT underneath.
Bring agents into your own product, automate a workflow, or build a custom interface.
Load your agent definition, start a session, and use its response in your application.
Embed with Rust or Python. Connect a separate client or service through ACP or HTTP.
use querymt_agent::prelude::from_config;

#[tokio::main]
async fn main() -> Result<(), Box<dyn std::error::Error>> {
    let agent = from_config(".qmt/profiles/agent.toml").await?;
    let session = agent.chat_session().await?;

    let result = session
        .chat("Summarize this workspace and suggest a next step.")
        .await;

    agent.shutdown().await;
    println!("{}", result?);
    Ok(())
}
import asyncio
from querymt_agent import Agent
async def main() -> None:
agent = await Agent.from_config(".qmt/profiles/agent.toml")
session = await agent.chat_session()
result = await session.chat(
"Summarize this workspace and suggest a next step."
)
print(result)
asyncio.run(main())Requires querymt-agent and Tokio with macros and a runtime. Use a configured profile with workspace-reading tools and provider credentials.
Read the Rust configuration guideRequires the querymt-agent Python bindings and a configured profile with workspace-reading tools and provider credentials.
Read the Python bindings guideYour providers. Their capabilities.
Use dedicated integrations for provider-specific behavior, connect compatible endpoints, or add a plugin for a different API.
Dedicated integrations
Provider-specific authentication, requests, streaming, and errors. Cloud lists show API-key and OAuth access; some services support both. Account requirements and limits vary.
Cloud APIs
- OpenAI
- Anthropic
- Mistral
- Groq
- xAI
- DeepSeek
- OpenRouter
- Alibaba
- Moonshot
- Z.AI
OAuth sign-in
- Anthropic
- Codex
- xAI
- Kimi Code
Local runtimes
- Ollama
- llama.cpp
- mistral.rs
- Izwi
- vllm.cpp soon
Your endpoint isn't listed?
Reuse the OpenAI plugin under your own provider name. Set its endpoint, model, and protocol; pass provider-specific request fields through extra_body.
Replace the example URL, key, and model with your provider values; keep credentials out of version control. Then select provider = "my-provider" in your agent profile.
Protocol behavior & limits[[providers]]
name = "my-provider"
path = "oci://ghcr.io/querymt/openai:latest"
[providers.config]
# Replace these literal values; this file does not expand env vars.
base_url = "https://compatible.example.invalid/v1/"
api_key = "YOUR_PROVIDER_API_KEY"
model = "YOUR_MODEL_ID"
api_mode = "chat_completions"Uses the endpoint's Chat Completions API. This is the default protocol when api_mode is omitted.
[[providers]]
name = "my-provider"
path = "oci://ghcr.io/querymt/openai:latest"

[providers.config]
# Replace these literal values; this file does not expand env vars.
base_url = "https://compatible.example.invalid/v1/"
api_key = "YOUR_PROVIDER_API_KEY"
model = "YOUR_MODEL_ID"
api_mode = "responses"
Uses the endpoint's Responses API with store=false and local continuation. Retention and continuation fields cannot be overridden through extra_body. There is no automatic fallback.
Protocol compatibility does not guarantee every provider-specific feature.
Different API? Add a provider plugin.
Implement the request, response, and authentication behavior your service needs. Provider plugins can be distributed as WASM or native libraries.
Start your first session.
Choose the desktop app or install the tools for terminal and web. Connect a provider, open a workspace, and give your agent a task.
An app for your workspace.
Install QueryMT Desktop with the agent runtime included. No separate CLI installation required.
All desktop downloads are available on the latest GitHub release.
macOS Apple Silicon DMG
View latest downloadsThis package is not included in the latest release. Choose another package or check the release on GitHub.
macOS Intel DMG
View latest downloadsThis package is not included in the latest release. Choose another package or check the release on GitHub.
Open the DMG, move QueryMT Desktop to Applications, and launch it.
Windows x64 EXE
View latest downloadsThis package is not included in the latest release. Choose another package or check the release on GitHub.
Run the x64 installer, then open QueryMT Desktop from the Start menu.
Uses the system WebKit webview. Default Linux build.
Linux WebKit x64 AppImage
View latest downloadsThis package is not included in the latest release. Choose another package or check the release on GitHub.
Linux WebKit x64 .deb
View latest downloadsThis package is not included in the latest release. Choose another package or check the release on GitHub.
Linux WebKit ARM64 AppImage
View latest downloadsThis package is not included in the latest release. Choose another package or check the release on GitHub.
Linux WebKit ARM64 .deb
View latest downloadsThis package is not included in the latest release. Choose another package or check the release on GitHub.
Bundles Chromium. Experimental Linux build.
Linux CEF x64 AppImage
View latest downloadsThis package is not included in the latest release. Choose another package or check the release on GitHub.
Linux CEF x64 .deb
View latest downloadsThis package is not included in the latest release. Choose another package or check the release on GitHub.
Linux CEF ARM64 AppImage
View latest downloadsThis package is not included in the latest release. Choose another package or check the release on GitHub.
Linux CEF ARM64 .deb
View latest downloadsThis package is not included in the latest release. Choose another package or check the release on GitHub.
Choose your runtime and CPU architecture. Install the .deb, or make the AppImage executable and run it.
Start from your shell.
One installer adds qmt, qmtcode, and qmtui. Run the web interface locally or stay in the terminal.
macOS
Stable
curl -sSf https://query.mt/install.sh | QMT_CHANNEL=latest shNightly
curl -sSf https://query.mt/install.sh | sh -s -- --nightlyWindows
Stable
$env:QMT_CHANNEL='latest'; irm https://query.mt/install.ps1 | iexNightly
$env:QMT_CHANNEL='nightly'; irm https://query.mt/install.ps1 | iexLinux
Stable
curl -sSf https://query.mt/install.sh | QMT_CHANNEL=latest shNightly
curl -sSf https://query.mt/install.sh | sh -s -- --nightly If macOS blocks qmtcode, run: xattr -d com.apple.quarantine "$(command -v qmtcode)"
qmt
qmtqmtcode
qmtcode --dashboardqmtui
qmtuiChat with your configured model. See qmt --help for options.
Use the same workspace interface as the desktop app in your browser. Open the local address printed by qmtcode.
Open a terminal session interface. Connect to a running agent or let qmtui start one locally.
Connect a provider.
In Settings / Providers, add an API key or sign in where supported. For a local model, configure its runtime and choose an available model.
See provider optionsGive it a task.
Choose your workspace and model, then start a session. Begin with a small task you can check.
Explain this project and suggest one useful next step.
Connect a provider in the dashboard.
Open the local address printed by qmtcode. As in the desktop app, use Settings / Providers to add an API key or sign in where supported.
See provider optionsGive it a task in your browser.
Choose your workspace and model in the dashboard, then start a session. The workflow is the same as the desktop app.
Explain this project and suggest one useful next step.
Connect a provider in qmtui.
Enter /auth in qmtui to open provider authentication. Choose your provider, then add an API key or follow its supported sign-in flow.
See provider optionsStart a terminal session.
Use /new to create a session or /sessions to open an existing one. In the session, use /model to choose a model, then enter your task.
Explain this project and suggest one useful next step.
Configure a provider with qmt.
OpenAI example: replace YOUR_OPENAI_API_KEY with your API key, then list the available models. Other providers use their own credentials or supported sign-in flow.
qmt secrets set OPENAI_API_KEY "YOUR_OPENAI_API_KEY"
qmt modelsSend your first prompt.
Replace MODEL_ID with an OpenAI model from the list and set it as your default. Send a prompt directly, or run qmt without a prompt for an interactive chat.
qmt default openai:MODEL_ID
qmt "Explain the difference between a model and an agent."A few things before you start.
Do I need a QueryMT account?
No QueryMT account is required to run the local tools or agent runtime. Cloud providers may require their own account, credentials, and billing.
Can I use it entirely locally?
Yes, with a local model runtime and tools that work on your machine. Download the required models and plugins first; cloud providers, web tools, and other network services still need a connection.
What leaves my machine?
The selected provider receives your prompts and relevant session context, which can include code and tool results. A remote provider host receives that context too, and integrations may send data to their services.
QueryMT also sends diagnostic traces and logs to its telemetry collector. Telemetry details and controls
What can an agent access or change?
That depends on its configured tools, runtime permissions, and the access of the process running them. File-editing and shell tools can change files or execute commands. Prompts and skills guide behavior; they are not security boundaries.
Do I need mesh or multiple machines?
No. A single machine is a complete starting point. Mesh is optional when you want to use providers, sessions, or agents on other trusted machines.